Grant Studio access to Dialogflow Virtual Agents
To create an open form type to use with Google Cloud Dialogflow, you must first grant Studio access to Dialogflow virtual agents.
These instructions apply to Google Cloud Dialogflow CX.
-
Log in to Google Cloud Dialogflow.
-
Select the project.
-
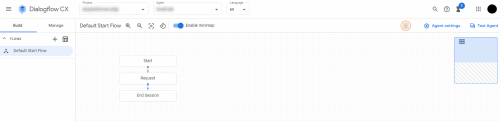
Click an agent to open the flow screen.

-
From the flow screen, click Agent Settings.

-
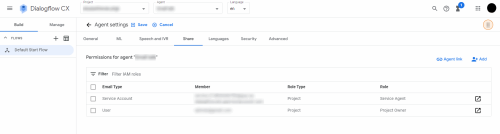
From the agent settings screen, select the Share tab.
-
Click Add.

-
Fill in the Add members or roles to agent dialog.
-
In the Email field, enter the identity associated with your Studio region.
-
From the Email Type field, select Service Account.
-
Click Add role and select Dialogflow Client.
Region
Dialogflow API Client Role
US inference@us-prod-219700.iam.gserviceaccount.com EU studio-mrcp-gw@prod-voice-pop-eu-91b2.iam.gserviceaccount.com IN studio-mrcp-gw@prod-voice-pop-in-f6ab.iam.gserviceaccount.com 
-
-
Verify the Permissions for agent table shows the newly added permissions.