Creating Tasks
Follow these steps to create a task.
-
From the Build menu, select Tasks.
-
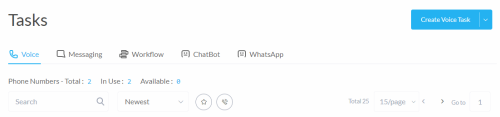
From the tabs at the top of the screen, select the task type:
- Voice
- Messaging
- Workflow
- ChatBot
For more information, see Task Types.
-
Click the create button in the top right corner.
-
Click to start with a blank canvas, a ready-built call flow from the task library, or a previously exported task.
Option Description Start with a blank canvas Use if you are experienced creating Studio tasks. Select from the task library Use if you are new to Studio. Browse the library, select a ready-made task, and configure it to your needs. Import Task Click to import a previously exported task. 
-
Fill in the Task Properties.
If you selected from the task library, any input and output variables required by the template display at the top of the screen.
-
Configure variables.
Supply initial values to configurable variables.
You see the configure variables screen only if the task contains configurable variables. For more on configurable values, see Start.
-
Configure TTS voices.
You see the configure TTS voices screen only if your Studio account cannot access text-to-speech voices used by the task.
Select from the text-to-speech voices accessible to your Studio account.
-
Configure import options.
When importing a task and creating a task from a template, content items are also imported.
Component
Description
Suffix for newly created content items
Type the suffix to apply to imported content items with name conflicts. If this field is left blank, the first six characters of the task name are used as a suffix. A content item is renamed from the original task if a content item with the same name already exists in the account.
Datastores
You can request that the task use a datastore already existing in the account if the datastore name is the same as that for the original task. Otherwise, a new datastore is created.
You can request that the task use the original datastore values if known. Otherwise, the initial values for the datastore are the existing values in an existing datastore or empty values in a new datastore.
Secure variables
Secure variables store credentials in a fully encrypted manner.
You can request that the task use a variable already existing in the account if the variable name is the same as that for the original task. Otherwise, a new variable is created.
You can request that the task use the original secure value if known. Otherwise, the initial value for the variable is blank, and you must assign a value to the variable once import is complete.
Redirect currently linked tasks
This section is relevant if the newly imported task is replacing a task.
Select the task this task is replacing.
The import process updates other tasks in the Studio account to link to this task (the task you are importing) in place of the selected task.
For example, task A links to task B through a link task node. Task C is being imported to replace task B. Select task B so on import the link task node in task A links to task C in place of task B.
Link task nodes
In a call flow, the link task node routes the call to another task within the account. Studio lists each link task node in the task you are importing. For each link task node, select a task in this account to link to. If no task is selected, the link task node is converted to a comment node.
Authentication profiles
Authentication profiles store credentials for use in an integration node.
If you leave this field blank, a new authentication profile is created in the account. The profile values are recreated from the original task. If the authentication profile is missing sensitive credentials, those fields are left blank, and the integration node displays a status error against the profile until you add new credentials.
You can assign to the integration node an authentication profile that already exists instead of creating a new authentication profile. The list of authentication profiles is ordered so those most similar to that used in the original task are listed first.
Note:This icon in the user interface indicates the authentication profile is missing sensitive credentials.

-
Click Go to Call Flow.
For more information on how to edit the call flow, see the Call Flow Editor.

